Sacramento Cabinet Refacing is a smart, high-impact upgrade that transforms your kitchen without the cost, mess, and disruption of a full remodel. It’s also a greener option that eliminates the waste of throwing out structurally sound cabinets and avoids unnecessary tree cutting.
But it’s important to remember that refacing isn’t right for all cabinets. They must meet certain criteria to be refaced successfully:
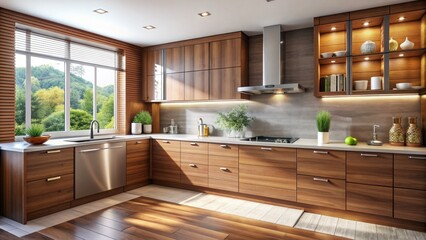
Cabinet Boxes
Cabinet refacing is a cost-effective way to give your kitchen or bathroom a facelift, and it avoids the messy and time-consuming work of pulling up and replacing your existing cabinets. The refacing process replaces the cabinet doors and drawer fronts with new ones, but leaves the cabinets’ bodies, or cabinet boxes, in place. It’s important to choose quality cabinet boxes that are sturdy and in good condition for your refacing project to be successful.
Cabinet box materials can vary significantly, and the construction method directly affects price. Cabinets can be built from solid wood or plywood panels covered with melamine or Rigid Thermofoil (RTF). The quality of the materials used is what impacts the weight your cabinets can hold, how long they will last, and their ability to accept a fresh coat of paint or veneer.
Before beginning a cabinet refacing project it is important to make sure the cabinet boxes are in good condition and able to accept a new finish. They should be smooth and free of cracks, splits or gouges. If the cabinet face frames are made of solid wood they will better accept a veneer and provide a stronger anchor for the new doors. You should also check that the internal hardware, like the drawer tracks and hinges, are in good working order.
Using solid wood shelves can add strength and stability to your cabinets compared to particle board which will sag over time. You should also look for a solid back panel that is reinforced at the corners to prevent warping or twisting over time. Cabinet back panels are available in plywood or MDF, and the more durable choice is to use plywood.
Cabinets that have adjustable shelves can be a big help for storage efficiency. They allow you to move the shelves to change the amount of space in your cabinet and can be useful if you are changing items frequently or have a lot of larger items to store. The thickness of a shelf is also an important factor. Thicker shelves are more stable than thinner ones and can hold more weight without sagging. Lastly, be sure to choose cabinets with good joinery techniques. The best joinery uses mortise and tenon or dovetail joints supplemented with nails and glue to ensure the strongest cabinet construction.
Face Frames
Cabinet face frames, also known as rails and stiles, create a rigid skeleton for the exposed side of a cabinet box. They’re often made of a different material than the less noticeable back and sides. Face frame construction adds stability to a cabinet and helps minimize an alignment problem called racking, where the vertical and horizontal components tilt out of square. Face frames also allow you to use a wide variety of door styles, and they give you the option to choose between inset, overlay, or partial overlay doors.
The first step in refacing cabinets is a simple one: removing the existing cabinet doors and drawer fronts and setting them aside in a safe spot. Once the old elements are removed you can begin removing any trim molding along the perimeter of the cabinets. This can be done with a putty knife or a small hammer and a pliers. Once the trim has been removed you can begin removing the cabinet boxes themselves.
Using the same tools as you used to remove the trim, remove the cabinet boxes from the wall and set them aside in a safe spot for refacing. Once the boxes are out of the way you’ll need to clean up any loose or deteriorated veneer. You’ll also need to remove the hinges and any other hardware.
Next you’ll need to determine if your cabinet boxes are good candidates for refacing. They need to be sturdy, have solid surfaces that accept new veneers and doors, and they should be in good condition with no obvious signs of wear or damage. They should also have an internal structure that supports the weight of the shelves and allows for easy access to drawers, if applicable.
Once you’ve determined that your cabinet boxes are a good candidate for refacing, you can proceed with the installation of the face frames. If your cabinet boxes are constructed of plywood or MDF panels with solid wood faces, they’ll likely accept the new veneers and doors without much trouble. Using wood clamps is recommended to secure the face frames to the cabinet boxes while the glue dries.
Internal Hardware
Cabinet refacing involves a lot of moving parts. It’s important to have all the essential tools and materials at your disposal to ensure a smooth and successful project. Start by examining your current cabinets. Are they in good condition? Sturdy construction and a good quality face frame that accepts veneers and anchors new doors are the best indicators of a refacing candidate. In addition, you’ll want to check internal storage elements like drawer tracks and hardware for wear and tear.
Then, determine if refacing will accommodate your desired look and functionality. If you have plans to sell your home in the future, for instance, you might want to stick with a neutral stain or paint color. Buyers tend to prefer natural wood finishes and white cabinets over more customized hues, which could detract from your resale value.
While refacing is usually performed by professionals, experienced DIYers can try their hand at it with all-in-one veneer kits (there are even peel-and-stick options!). But this type of work requires skill and training to ensure the veneer stays intact. Using the wrong adhesives or installing the veneers improperly can cause problems in the long run.
To reface your kitchen cabinets, you’ll need to remove the cabinet pulls and knobs and carefully take off the doors and drawer fronts. Next, you’ll need to remove the hinges and clean off the surfaces to prepare for the cabinet refacing process. You’ll also need to sand the existing cabinet boxes and face frames to eliminate rough spots, dirt, and grime.
When you’re ready to install the new cabinet hardware, you can use toggle bolts to mount the cabinets to the wall. To prevent drywall damage, make sure to use a stud finder to locate and mark the locations of each stud in the wall before drilling or tapping into it.
Once you’ve marked the location of each toggle bolt, use a drill to make the holes that will anchor the cabinet to the wall. Start with a smaller bit and slowly move up to the correct size to avoid splintering the surface of the wood.
Veneers
Veneers are used to cover the front of a tooth, and they come in a variety of colors and shapes. They can also be used to close gaps, reshape teeth, or correct misalignments in the bite. They are made of either a composite resin or porcelain. Composite veneers are a more economical option, but they can stain and chip more easily than porcelain.
To begin veneering cabinets with your kit you will need a piece of sheet veneer that has a PSA (pressure sensitive adhesive) backing and a piece of rolled wood edge banding. Begin by applying the veneer to any exposed end panels of the cabinet using the PSA. You will need to trim the end panels so that they are flush with the edges of the face frame. You will then need to apply the rolled edge banding to the ends of the stiles, a process called wrapping (FIG – 5). The edge banding is supplied pre-cut for this step but it may not be exact to your cabinet height so trim a small amount from each side so that there is an even overlap on each end of the face frame.
The face frames themselves will need to be cleaned and sanded with 120-grit paper. Then the insides of the frame will need to be primed and sanded again with a finer grit. After priming and sanding the cabinet box and face frames are ready to receive their new veneer.
Once the boxes and faces are in good shape it is time to start installing new doors and drawer fronts. Depending on the condition of the existing hardware, this can be done in a day or two. New knobs, handles, or pulls can be installed at this point too.
Before applying the veneer it is important to note that not all cabinet boxes are suitable for refacing. It is necessary that the boxes have sturdy construction, with plywood or MDF panels in good condition and smooth surfaces to allow the veneer to adhere properly. The boxes should also have solid hardwood face frames that accept and anchor the new door veneers. Cabinets that have curved edges or design features will not work well with veneer, and they will need to be rebuilt with a new face frame before they can be refaced.