Roofing installation transforms your roof and enhances your home’s appearance. Proper installation methods protect the investment you make in your roofing system and prevent water intrusion.
Your contractor will protect the eaves with drip edge, and the valleys with flashing (a narrow, galvanized steel material that directs water away from critical areas like chimneys, vents and wall intersections). A moisture barrier may also be installed along eaves and at ridges. Visit https://www.fivestarroofingandcontracting.com/metal-roofing-jenks-oklahoma to learn more.
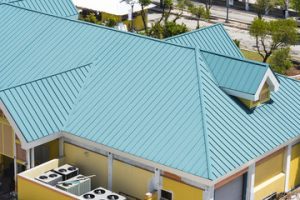
The preparation phase of roofing installation consists of clearing the work area and protecting items in the home or yard. An experienced contractor will have a plan for covering delicate areas like flower beds and gutters with tarps, having a dumpster delivered, and using wooden boards to protect things like air conditioning units from falling debris during the tear off process.
During roof replacement, there will be vibrations from hammering on the roof that can travel through your walls and cause fragile items to fall or break. It’s a good idea to remove light fixtures and cover any items stored in your attic with plastic tarps before the crew arrives. If you have children, you may also want to arrange for them to stay with friends or family for the duration of the project.
It’s courteous to inform your neighbors about the upcoming roof replacement in advance. They can plan accordingly, and you’ll avoid any inconveniences to them and their homes during the construction period. Before the crew begins working on your roof, you should also confirm a few other details with your contractor, including how they will handle cleanup, where materials will be delivered and stored, and what to expect in terms of noise, dust, and potential delays caused by weather or material delivery. These are all easy steps to take to ensure a smooth and hassle-free roofing installation project.
Flashing
Flashing protects the most vulnerable parts of a roof from water infiltration and other weather damage. Usually made from durable materials like metal and rubber, flashing keeps water out by preventing the flow of moisture, penetrating damp, and debris build-up. It also redirects the flow of rainwater around areas of a home that are more susceptible to leakage, such as the terminations and intersections of surfaces and roofing systems.
A variety of flashings are available, including base flashing, step flashing, and apron flashing. These are thin pieces of impervious material that can be installed in places like chimneys, valleys, and where a roof meets a wall or dormer. They are shaped and positioned to prevent water leakage in those spots.
Vent pipe flashing is another type of flashing. These are typically cylindrical pieces of flashing with a wide flange that integrates with your roofing materials, covering the opening and sealing it. They can also be colored for a seamless appearance and to match other colors in your roofing system.
Finally, electrical mast flashings are a specialized form of flashing that creates a watertight seal around the cable or mast used to carry electricity to your building’s service entrance. These are often shaped and fitted to fit the unique dimensions of the mast. They can also be matched to the color of your roofing system for a seamless look and added protection from corrosion and weathering.
Underlayment
After any repairs to the roof deck are completed, a waterproof underlayment is installed. This is an important step that helps prevent water from seeping through the deck to the interior of your home. It’s typically made from a synthetic or felt material and creates an extra layer of protection against moisture.
There are a few different types of underlayment available, depending on your flooring type and installation method. For example, a traditional underlayment for solid hardwood is a 15-pound asphalt-saturated paper (similar to roofing felt but designed to not have a tar smell). Foam underlayments are used for floating click-lock floors and some are rated for nail-down installations as well. Other underlayment options include cork, which is a more eco-friendly choice and acoustically efficient for sound control in residential applications.
It’s also possible to use rubber underlayments, which are self-adhesive and are especially effective in critical areas like valleys or around protrusions (like chimneys). Your roofing professional can advise you on the best option for your climate and roofing materials.
Contractors should lay the underlayment evenly across the entire roof surface, making sure there are no gaps or bare spots. They should pay special attention to the edges and eaves, and install any flashing or vents that are needed. The underlayment will provide the foundation for the shingles and roof decking to protect your home from the elements.
Shingles
Once the underlayment and leak barrier have been installed, the shingles are ready to be put in place. Shingles are the part of your roof that you see, so it’s important to choose a color and style that suits your home. It’s also a good idea to pick a shingle that meets local building codes in terms of fire resistance and Title 24 compliance.
Besides providing a unique aesthetic, shingles keep moisture and debris out of your house and protect the wood framing from damage. They can also withstand impact from hail and falling tree limbs, which makes them a popular roofing choice for homeowners in areas with high winds.
When choosing shingles, it’s best to go with architectural laminated shingles, which are thicker and more rugged than 3-tab shingles. They’re able to withstand stronger winds and are available in a wide range of colors, including options designed to look like tile or wood shakes.
When shingles are installed, they’re typically layered in courses, with starter shingles placed at the bottom of the row and ridge slates at the top of the roof. It’s important to follow the recommended nail pattern when laying these shingles, as doing so will ensure that the roof is watertight and prevent water from seeping into your home. If you’re concerned about rust, consider metal shingles as they’re rust-resistant and will never need to be painted.
Ridge Cap
The ridge cap is a crucial step in the roofing installation process, providing a finished look and helping to seal the roof’s peak against water infiltration. It requires precise cutting and placement to ensure a tight, effective seal along the ridge line. This is a high-stress area of the roof, and mistakes can lead to leaks or wind damage. Proper installation and proper maintenance of the ridge cap will help to protect against these problems.
Ridge caps are typically made from asphalt shingles, similar to regular shingle roofs, but they’re specially designed for the highest points of the roof. These areas are more exposed to the elements, and ridge caps are manufactured with enhanced adhesive strips to prevent them from blowing away during storms.
Because of the additional layer of protection they offer, ridge caps also provide better ventilation for the roof. This will help to maintain the integrity of the shingles and extend their lifespan by preventing moisture build-up.
Depending on the material used and local weather conditions, well-maintained ridge caps can last anywhere from 10 to 30 years. However, it’s important to perform routine inspections and maintenance to identify any signs of damage or wear, and to address these issues promptly. This will help to extend the lifespan of your roof and help it to withstand even the harshest weather conditions. In addition, regular maintenance can help to reduce the risk of roof insurance claims.